

Before you build a website, you should plan goals, audience, structure, content, and launch steps so nothing surprises you mid-project. This guide works as a beginner-friendly website planning checklist, with practical decisions you can make in order. It also helps prevent rework, because clearer goals lead to better structure, and better structure makes design and build simpler. In 2026, you may have more tools and templates than ever, but the planning fundamentals still decide whether your site feels coherent or chaotic.
This planning approach is for first-time site owners, small teams, students, freelancers, local businesses, and hobby projects. If you are not technical, you can still plan confidently. If you have a developer or designer, planning gives you a shared map and fewer revision loops. Either way, you will know what “ready to publish” actually means.
Contents
- 1 Map your website goals and define what “success” looks like
- 2 Choose a site type and structure that matches your content and business model
- 3 Perform audience + competitor research to inform your plan (not copy it)
- 4 Outline your content plan, including navigation, messaging, and CTAs
- 5 Select domain, hosting, and a platform approach that supports your future growth
- 6 Plan for design, usability, and accessibility so visitors can use your site
- 7 Integrate SEO foundations and site discoverability during planning
- 8 Set up analytics, tracking, and launch readiness before you publish
- 9 Choose realistic timelines, budgets, and responsibilities for a smooth build
- 10 Avoid common beginner traps when using a website planning checklist
- 11 Compare practical planning paths for different beginner website scenarios
- 12 Plan for local businesses and community sites without creating thin pages
- 13 Turn objections into decisions during website planning
- 14 Frequently Asked Questions About Essential Website Planning Checklist for Beginners
- 14.1 How long should it take a beginner to complete a website planning checklist?
- 14.2 What pages do I need for a small business website before I build it?
- 14.3 Should I plan my content first or design first?
- 14.4 What should I write in each page outline for a beginner site?
- 14.5 How do I choose a website platform if I’m not technical?
- 14.6 What does “launch-ready” mean for a new website?
- 14.7 How do I avoid wasting money on web design as a beginner?
- 14.8 Is it okay to launch with a minimal blog as long as pages are planned?
- 14.9 Do I need SEO planning before I have content?
- 14.10 How can I keep my website plan flexible when my goals change?
- 15 Conclusion
Map your website goals and define what “success” looks like
Start by deciding what your website must accomplish, because every other planning choice depends on that. Without clear goals, you often end up changing navigation, rewriting pages, and rebuilding sections late in the process. That usually costs more than it should, especially for beginners who learn as they go.
For example, an informational site aims to help people answer questions. A lead generation site aims to get contact form submissions or email signups. A sales site aims to drive purchases. A booking site aims to schedule calls or appointments. Meanwhile, a portfolio site aims to showcase work, and a community site aims to sustain engagement.
Next, turn goals into simple targets you can measure without advanced analytics. Track email signups, contact form submissions, button clicks, purchases, or time on page. Then define your baseline and your “good enough” outcome for the first month after launch. Even a single target helps you plan pages more precisely and improve faster.
Clarify your audience by picking one primary persona first. List their top questions and the problems they want solved. Then add a scope boundary for your first version, so your MVP does not inflate. A common success blocker is trying to include every feature at once, especially when goals are fuzzy. In reality, goals also influence what content you prioritize, not just what pages you build.
Choose a site type and structure that matches your content and business model
Your site type determines how users move from curiosity to action. In planning, choose the closest match before you pick a theme or layout. When you skip this, you may build a structure that does not support your main user journey.
Beginner-friendly site categories include service or business sites, blog or content sites, ecommerce stores, portfolio sites, landing-page plus campaign setups, and membership or community sites. Each one needs different page roles. A service site needs clear service explanations, proof, and a strong contact path. A blog-first site needs topic organization and ways to convert readers to signups. A landing page setup needs one primary message and a focused CTA.
Now plan your information architecture. Decide what the homepage must do, what top navigation items represent, and how users progress toward your chosen action. Then define reusable page templates so your site stays consistent. Typical templates include Home, About, Services or Products overview, a dedicated Contact page, an FAQ page, and a Blog index if you publish.
Finally, set “must-have vs nice-to-have” pages for launch. Many beginners overbuild and dilute their core message. For a service site, starting with around five to seven pages can work well, as long as CTAs and internal navigation paths are clear. In contrast, a content site may need fewer sales pages but must include topic structure and index pages. The tradeoff is simple: fewer pages can launch faster, but only if your conversion path is still obvious.

Perform audience + competitor research to inform your plan (not copy it)
Research helps you build a plan based on how real people get answers, not on what you assume they want. This is where many beginners copy layouts without copying strategy. Instead, capture patterns that affect clarity and conversion paths.
Compare competitor sites for positioning, messaging clarity, page structure, and how they move users toward action. Look for how they present their offer, what questions they answer, and what trust signals they show. Then capture what’s missing or confusing in your own perspective. That gap becomes your differentiation statement.
During research, write down headlines and section types, not just visuals. Note page order, navigation patterns, and how offers appear. Also list recurring customer concerns and objections. Once you have this, turn it into a content and topic list based on audience intent. For example, if users search “how much does it cost” or “what’s included,” those topics guide page sections and FAQs.
The deeper insight is that research should shape structure and content, not your colors. A common edge case is when competitors rank well but serve a different audience segment. If their pricing model, service area, or commitment level differs from yours, copying their pages may attract the wrong visitors. Another nuance is avoiding “design-by-clipboard,” where you copy wording patterns but lose your unique angle. Your goal is to improve your plan, not to imitate.
A content outline keeps your build from turning into a guessing game. Before you write every page, plan the order of sections and the message hierarchy. This helps you avoid blank-page paralysis, because you always know what comes next.
Create a page-by-page outline for your launch set. For each page, define one primary message and two to four supporting points. Then decide the best section order. For a service page, for example, that might be who it’s for, the problem you solve, what’s included, proof, and next steps.
Next, design a consistent CTA strategy. Pick one primary CTA per page, such as “request a quote,” “book a call,” “contact us,” or “subscribe.” Add a secondary CTA only when it naturally helps. Place CTAs where the reader expects a next step, often after proof or after you answer a key question. This is how design connects to outcomes.
Then plan trust-building content. Identify what you can show now: credentials, case examples, testimonials, process explanations, and guarantees when relevant. If you do not have photos or proofs yet, outline placeholders and schedule their replacement before launch. A common mistake is waiting for perfect media while the site skeleton sits unfinished. Instead, build drafts first, then refine once your proof materials arrive.
Select domain, hosting, and a platform approach that supports your future growth
Your platform choice affects maintenance, costs, and how easily your site can evolve. In planning, separate domain registration from hosting, because they solve different problems. Then choose a hosting setup that is reliable and backed by support.
For beginners, “reliable hosting” often means stable uptime, automatic backups, clear restore options, and responsive support. If you do not plan for backups early, you can face stressful losses later. Also consider whether you want managed updates or self-managed control, since both change your ongoing workload.
Now compare website builders, content management systems, and custom builds. Builders often reduce setup time and technical decisions. A CMS can offer more flexibility and better long-term control over templates. Custom builds may offer maximum control, but they require more planning and maintenance. Pick based on your update frequency, content complexity, and whether you can manage updates yourself.
A practical way to avoid painting yourself into a corner is to plan migration paths and content exportability. Also consider whether you can swap templates without breaking core structure. In 2026, plugins and themes update often, but they still need testing. Plan for staging environments and for what happens if a plugin becomes unsupported. That operational planning prevents future rebuilds.
Plan for design, usability, and accessibility so visitors can use your site
Design planning is about clarity, not decoration. When your layout supports reading and action, visitors can complete goals with less effort. This is especially important for beginners, because small usability issues can silently reduce conversions.
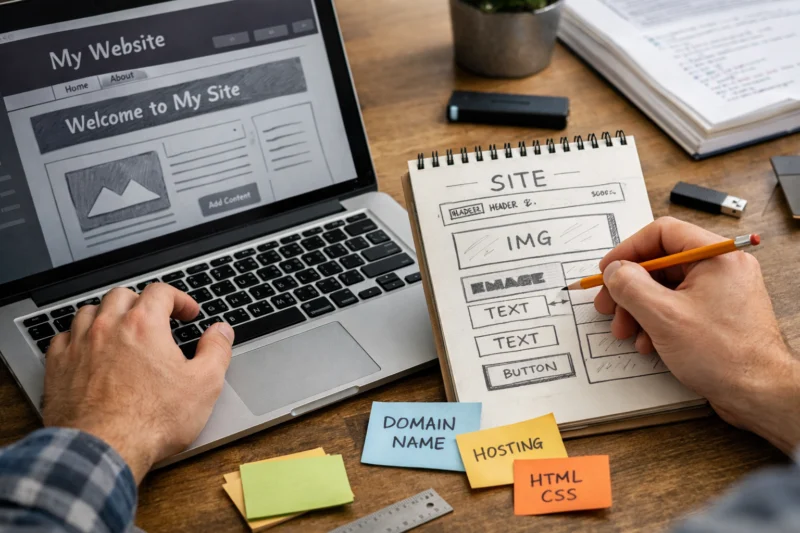
First, plan basic wireframe logic. Decide how the page flows, where headlines sit, and what sections support the main message. Use a mobile-first mindset, because most visits start on small screens. Plan navigation that is easy to scan and forms that are simple to complete.
Next, plan usability rules. Use readable contrast, clear heading structure, and consistent spacing. Make forms short and forgiving, with clear labels and helpful error messages. For accessibility planning, keep it practical. Plan for keyboard navigation basics, use meaningful headings, and adopt a simple approach for image alt text that describes what the image shows.
Visual consistency matters too. Define branding rules for colors, typography, and imagery, then apply them across templates. The deeper insight is that “looks good” does not guarantee results. If CTAs are buried or headings do not guide attention, the site can fail to convert even when it looks polished. A common edge case is a design that works on desktop but makes forms unusable on mobile. Plan responsive behavior during wireframing, so issues are cheaper to fix early.
Integrate SEO foundations and site discoverability during planning
SEO planning should happen before launch, because structure and discoverability problems are hard to fix later. You do not need to become an expert, but you do need consistent choices. Planning also prevents the last-minute scramble where pages go live thin or disorganized.
Start with page topics and a simple URL structure approach. Plan your headings, internal section topics, and metadata basics like titles and descriptions. Also plan internal linking rules so related pages support each other logically. If your build tool requires specific formats, decide that during planning so authors do not improvise later.

Then ensure indexable content. Avoid launching with empty pages, duplicates that confuse navigation, or pages with no useful purpose. Use a lightweight keyword-to-page mapping method based on intent. Assign a topic to each planned page so you do not create multiple pages that compete with each other. A helpful resource for beginners is Google Search Central’s guidance on SEO basics: Google Search Central.
Technical discoverability needs attention too. Plan a sitemap strategy and ensure canonical or duplicate-like pages do not cause confusion. Also plan your launch QA to avoid broken links, missing images, and redirected mistakes. The nuance is that SEO is not just keywords. For beginners, usefulness, clear structure, and steady improvements often matter more than obsessing over metadata alone.
Set up analytics, tracking, and launch readiness before you publish
Launch planning includes measurement and quality checks, not just page design. If you do not set up analytics early, you lose the first signals about what works and what fails. Then improvements feel random instead of evidence-based.
Define what you measure from day one. Track traffic sources and your conversion actions, such as form submits or purchases. Also monitor top page paths, so you know what content drives attention. Then plan event tracking for specific beginner goals, like contact button clicks and form completions. You want to verify that the analytics events trigger when users complete the action.
Next, create a launch checklist mindset. QA should cover broken links, mobile display, form submissions, and redirects if you changed any URLs. Also verify image sizes and media loading, since slow pages can frustrate visitors. Pre-launch QA prevents embarrassment and reduces support tickets right after launch.
Plan privacy and consent decisions early. If you use analytics tools that require consent, decide how you will handle it on your site. Waiting until after launch often creates rework, because legal or consent changes can affect scripts and tracking setups. For consent concepts, see resources from the U.S. Federal Trade Commission: FTC. For analytics setup basics, use official platform docs from your analytics provider.
Choose realistic timelines, budgets, and responsibilities for a smooth build
Beginner websites succeed when timelines and responsibilities are realistic. Many projects stall because content is not ready, approvals drag, or tasks overlap without clear ownership. Planning prevents that by defining phases and dependencies.
Break the work into phases: planning, content creation, design/layout, build, QA, launch, and then iteration. Set dates for content drafts, photo collection, and proof gathering. Then set a build window that assumes content will change. In practice, copy and media updates are normal during the final week, so plan for it.
Budgeting should include more than domain and hosting. Many beginners forget photography or illustration costs, copywriting time, accessibility and design adjustments, and ongoing maintenance. Also plan for software costs like email marketing tools if your CTAs require them. If you hire help, budget for review cycles and revisions.
Clarify who does what. The owner should approve messaging and offer details. The designer should own layout rules and visual consistency. A developer or freelancer should own technical build decisions. One deeper insight is that underestimating content readiness is the most common failure mode. Create a dependency list for what the build cannot start without, such as final service descriptions, pricing notes, and proof assets.
Avoid common beginner traps when using a website planning checklist
A checklist only helps if you avoid the patterns that derail beginners. The first trap is starting with design before you know goals and structure. When you choose colors and layouts early, you often redesign later after you learn your site should prioritize a different message.
Another trap is making too many pages for the first version. You can still plan your conversion path with fewer pages, as long as CTAs and user navigation are clear. Overbuilding dilutes your core offer and creates thin pages that do not help visitors. Instead, plan an MVP page set that answers the biggest questions and supports action.
Usability and readability also fail early. Beginners may test only on desktop or ignore form friction. As a result, visitors bounce before they reach the CTA. Plan mobile navigation and form usability before you finalize the design.
Finally, do not skip content planning. Vague copy looks “fine,” but it does not build trust, and it weakens SEO structure. A nuance many miss is that “done” is not the same as “launched.” Launch-ready includes QA checks, tracking verification, and a simple plan to update based on feedback. Treat planning as ongoing, not as a one-time form.
Compare practical planning paths for different beginner website scenarios
Your best planning path depends on your starting point and your content rhythm. The goal is not to follow a trendy workflow. The goal is to match your process to how you will maintain and update your site.
If you prefer a builder-first approach, it fits simple sites where you want minimal maintenance. In planning, still define a page set, CTA placement, and content drafts early. Also plan for template consistency, so your homepage, service pages, and contact page do not feel disconnected.
If you choose a CMS-first approach, it fits websites that grow through regular publishing. You will want reusable templates and clear editing workflows. Plan your topic structure, your category or index pages, and how new posts link back to your primary offer pages. The tradeoff is more setup and more responsibility to maintain templates and plugins.
For campaign or landing-page scenarios, plan one strong conversion page first. Then expand into deeper site sections once the page proves the message. This approach limits scope risk and reduces content pressure. For template + customization plans, choose a starting template that supports your usability and SEO structure needs. A common edge case is “future feature creep,” such as moving from lead-gen to ecommerce. In that case, ensure your planning accommodates modular pages and reusable sections so you do not require a full rebuild later.
Plan for local businesses and community sites without creating thin pages
Location context can shape how visitors understand your coverage and trust your offer. Even if your services are local, your planning should focus on clear communication, not on repeating location terms everywhere. The aim is to help people confirm fit quickly.
Plan sections that clarify service areas and logistics. For a local business, you might add a service area note, clear coverage boundaries, and contact details that match your actual process. For community sites, planning may focus on local events, participation guidance, and community proof, such as member stories and references.
Imagery and proof should match the audience’s region. Use real photos, authentic testimonials, and examples that feel relevant to the people you serve. The deeper insight is avoiding overpromising coverage. Also avoid creating many near-duplicate location pages that add little value. That can dilute quality and confuse users who land on a similar page without new helpful content.
One nuance for beginners is to start with one clear “how we work in your area” explanation. Then add location-specific details only when they add real value, like different service options or unique FAQs. In planning, treat location pages as content projects, not as SEO shortcuts.
Turn objections into decisions during website planning
Planning often feels hard because you think you need every detail upfront. Instead, map structure first, then fill in copy as you gather proof. This approach turns uncertainty into a set of decisions with clear next steps.
If you feel, “I do not know what to say yet,” outline the page sections first. Identify what each section must accomplish, such as explaining services, addressing concerns, or showing proof. Then write placeholder headlines and bullet ideas. After that, gather inputs like quotes, photos, portfolio items, and example outcomes. You will replace placeholders before launch.
If you worry that planning will delay launching, use phased delivery. Build the essentials and stub safe placeholders where media is pending. Do not stub anything that affects conversion clarity, like the offer definition or CTA paths. A simple tradeoff is investing planning time to avoid wasted build time later.
If your goals might change, plan modular sections and reusable templates. For example, you can design a services template that can expand from one service to several later. If a team is involved, collect feedback early and define decision ownership for copy and design. The deeper nuance is knowing which decisions are “hard” versus “soft.” Hard decisions include site structure, main CTA paths, and measurement goals. Soft decisions include exact wording, photo style, and minor layout tweaks.
Frequently Asked Questions About Essential Website Planning Checklist for Beginners
How long should it take a beginner to complete a website planning checklist?
A beginner planning checklist can take about one weekend to a couple of weeks, depending on how clear your offer is. It gets longer when you need to gather proof, photos, or final service details. You can move faster by doing a first draft plan even with incomplete content, then tightening details later.
What pages do I need for a small business website before I build it?
A common baseline is a homepage, an about page, a services or offerings overview, a dedicated contact page, and a simple FAQ page. If you publish articles, add a blog index too. Add extra pages only if they support a clear audience question or conversion step.
Should I plan my content first or design first?
Plan content and page roles first, then use design to support the hierarchy. When you design first, you may force copy into layouts that no longer match your message. A good compromise is wireframe structure first, then write or draft copy with the sections in place.
What should I write in each page outline for a beginner site?
For each page, write a one-sentence goal, then list the sections that support that goal. Include your primary message, proof points, and the CTA placement you want. Keep the language simple and specific so you can draft quickly and refine later.
How do I choose a website platform if I’m not technical?
Choose based on who will maintain the site and how often you will update it. If you want low maintenance, a builder can be simpler, but plan template limitations. If you want flexibility for future content growth, a CMS may fit better, as long as you can manage updates responsibly.
What does “launch-ready” mean for a new website?
Launch-ready means your pages work on mobile, forms submit correctly, and links and redirects behave as expected. It also means tracking is verified for your goals, such as contact clicks and form completions. Finally, you have a basic plan to monitor performance during the first week.
How do I avoid wasting money on web design as a beginner?
Prevent scope creep by locking your MVP page set and CTA paths before design begins. Spend early time on messaging and content outlines, because unclear copy drives revisions. Also budget for review cycles and set decision owners so feedback does not stall the project.
Is it okay to launch with a minimal blog as long as pages are planned?
Yes, you can launch with a minimal blog if your site pages still fully support your main goals. A blog helps over time, but the site must still answer core visitor questions. Plan blog categories and internal paths so new posts naturally support your conversion pages.
Do I need SEO planning before I have content?
You can plan most SEO foundations before writing, such as site structure, page topics, and heading patterns. You can also decide how your pages connect through internal linking rules. Then, you create content that genuinely satisfies those planned topics so SEO does not become a last-minute scramble.
How can I keep my website plan flexible when my goals change?
Keep your plan modular by using reusable page templates and section patterns. Also define what is essential for launch versus what can evolve later. When goals shift, update your page role outlines and CTAs first, then refine supporting content.
Conclusion
If you follow this essential planning approach, you will start with clear goals, the right site structure, and a realistic content plan. You will also choose a platform that supports how you will maintain your site in 2026 and beyond. Most importantly, you will set launch readiness with QA checks and measurement so you can improve based on real outcomes.
A website planning checklist works best as a process, not a one-time form. Plan, build, test, and then iterate using what visitors do and what they ask for. Before you choose tools or templates, create a first-pass sitemap and page outlines so decisions stay consistent.
As you move toward build time, gather proof early such as photos, examples, testimonials, and clear offer details. That prevents delays when you are ready to publish but still missing key inputs. If you want a next step, compare two platform approaches using the same criteria you considered : maintenance effort, flexibility, cost, and how easily you can update content. Then proceed with your first-pass site plan and build the version you can confidently launch.
Updated September 2026